Followers (I'd love to have you join)

Showing posts with label Baby. Show all posts

Wednesday, August 10, 2016

Welcome Sweet Baby Boy Card

Here is a little card I made for a shower (and a challenge over at Dies R Us). I thought the baby with the teddy was to sweet.    
This image, by Ruth Morehead, I imported to Cricut Design Space so it would do all the fussy cutting for me.


I pop doted the little guy and inked all the edges.

 
Supplies:
  • Cartridge:  *Sweet tooth boxes (sweet), Zooballoo (welcome), *Designer Calendar (baby),
  • Papers-  Cream, baby blue, medium blue (for "sweet"),  Kraft also for (card base and envelope).
  • Spellbinders - Borderabilities - A2 Scalloped Borders OneSpellbinders - Borderabilities (for cards bottom edge)
  • Adhesive - Pop dots, ATG tape runner, Glue
  • Ink - brown for edging
  • Printer (for clipart)
  • Cuttlebug with embossing folder (don't know name - it is an older with out a name on it)
  • Clip Art, D-3 Decoupage - Morehead Inc.
 
* Free with Cricut Design Space
 
Challenges I am entering this in:
  1. Dies R Us - Babies (closes 13 August)
  2. DLART - Anything Goes (closes 10 Aug)
  3. Little Scraps and Pieces - Show it off Saturday (closes 6 Aug)
  4. Tuesday Throwdown - New Addition (closes 9 Aug)  (I Won Top 3!)


Thursday, July 28, 2016

Sweet Baby Cards

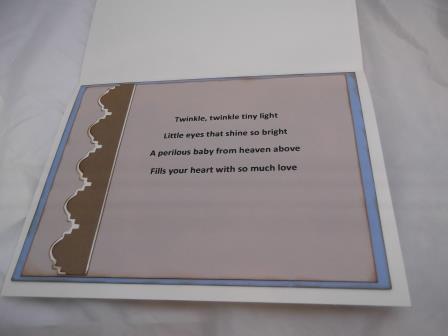
Sweet baby cards for some challenges I am entering (see below). I made two versions of the same card with the same precious vintage art work  - one in pink and one in blue.

On the pink one you can see the embossing I did .


Supplies:
  • Cricut: For "congratulations", label, and decorative edges
  • Cardstock:  Cream, pink, baby blue, brown, beige
  • Ink: Brown
  • Ribbon
  • Printer (for sentiment and baby image)
  • Cuttlebug with bandana embossing folder
  • Brads (mine are from CTMH)
  • Glue, pop-dots, and ATG tape runner

Challenges I am entering this in:
  1. Scrappy Land - Emboss it (closes 31 July)
  2. Simon Says Stamp - Monday Texture (closes 31 July)
 

Friday, June 17, 2016

BOX CARDS


I have been going goo goo for the new All Occasion Box Card Cartridge from Lori Whitlock.  So here are several I have done in the last month or two.  They include Birthday, Graduation, Mother’s Day, Baby, and Wedding.  Love, love, love these box cards. 
MOTHER'S DAY CARD

 They fold up flat and the flaps flip up to keep safe for mailing.!
 I used some clear left over packaging and cut strips to give a “floating image”.

WEDDING CARD

Added embossing from an Anna Griffin Folder and some mini pearls for an extra touch - lovely! 


FOR THE GRADUATE

I added some of my own cuts for the "Class of 2016" and some balloons that were not on the original cut file.

Gift card holder added to back of box.


WELCOME LITTLE ONE


I added a coordinating gift card holder for these. 


HAPPY BIRTHDAY (sharing this with The Paper Players blog)

I welded two pieces together, added a fold line to give a little spot for a personnel note
Sharing this one on The Paper Players

I used the clear plastic here for the base -  love how the explore can cut through so many materials.

I used left over packaging strips again to give a “floating image”.  
I added addition Cricut cuts to come of these to give them my own touch. .

This cartridge is not included in Cricut Access and requires an additional purchase -  It is so worth it for these cute pop up boxes.


I will be posting a few more of my own designs soon.   


Wednesday, October 31, 2012

Baby Side-Step Card

Hey all,

It has been a while so I thought it was about time that I posted something.  Before you know it Christmas will be upon us – I know I’ll have little  time to post then.   
I decide to share a card I made for a friend of mine who just had another grandbaby.  I have been seeing these cute side-step cards for a while now and wonted to try one myself.  Here is my take on it.

I used Everyday Paper Dolls, Life’s a party, and  Art Philosophy cartridges.


B
D


C
 
A
 
 
  • This is a 10  in by 7 Sheet of cardstock (may need to trim down to fit in 5x7 envelope)
  •  Dotted lines are score lines and dark line is cut line.
  •   Cut line is centered and starts 1 inch from bottom and is 5 inch long (Ends 6 inch from bottom)
  •  Score at start and stop of cut points on one side. (lines A &B)
  •  Score another line an inch up from first.(line C)
  •   Score last line on opposite side of cutline 5 inch from bottom (line D)

I inked my edge and used a stamp from Emma over at My Creative time. 

Other items:  6 brads, paper clip clothes hanger, pop dots, adhesive, chalk, & coordinating scraps of paper.
This last photo is of the critter I wrapped around the baby blanket -  I made ducks on another post – easy peasy!


Wednesday, March 14, 2012

Just Ducky - Baby Gift

This was super easy!  I put these together for some twins of an acquaintance.  I scrap-lifted the idea and added my own flare.  The idea was posted by craftycathryn on the circuit forum.  Hers are supper cute – she has the large Peachy Keen stamp set for the faces (you can see them on her blog In the Pink Designs, by cathryn here.  I love the way hers look so bright & cheery.  For mine, I added a receiving blanket wrapped around the packages of wipes.   

Duck features:    First, cut a sheet of paper to fit around each package.  I did not have the big peachy keen stamps so I had to piece- mill them together in the Cricut Craft Room.  I actually wielded two light bulbs ornaments from Create-A-Critter cart to make the duckbill, and then I used a sign shape for the feet.  Then cut in half, what I think was a pillow, for the individual wings ( all from Create A critter).  I inked the edges of everything, added two brads each for the eyes, then made a quick little card using Nursery Tails.


Thanks for looking

God Bless &  Happy Scrapin’