Followers (I'd love to have you join)

Friday, July 6, 2012

MY SCRAP SPACE 2008 and TODAY

My friends and family know I can pack ten pounds of “stuff” in to a 5-pound sack and make it look like it is meant to hold that much.  Some may think that is a good skill to have, right?  Well, you first one must ask; “How did she attain such a handy skill”?  Simply put, I acquire so much “stuff” in my desire to full fill my instinctual need to gatherer (you know, that latten gene left over from more primitive times); that my packing skills have become a necessity – that is if I do not want to live in complete chaos. 

All that said, to let you know I share my craft “room” with the home office.  Have I told you we are a family very dependent on our computers?  We have five personal computers in the house with four of them having stations set-up in our 11 X 13 office.  Yes, that is five-work station in one room.  I have the larger half of the room and the three guys (DH, and 2 DS) each have a desk space on the smaller half.  That is a perfectly fare split if you ask me, after all, I have gathered more stuff.

In our previous (larger) home, I had a closet with all my “stuff” crammed very neatly into it.  I could just close the closet and no one would be the wiser about all the plunder that lurked behind.  Not only that, it was upstairs off the game room – adult gussets did not normally go up there anyway. 

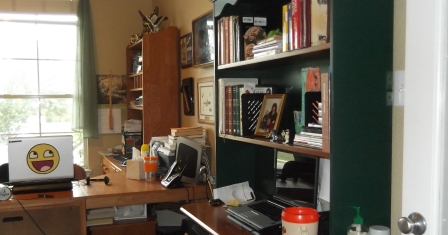
My offic looked  in 2008 - 6 months after we moved in
Any hoo, when we first moved in to this house, 4 plus year ago, I had a Hodge-podge of “furniture’ used to store my crafting “stuff” and no extra closets.  It was such a sore thumb in our brand new home. After all you really can’t say, “Hey come see our new house, but please don’t look in that room with the glass doors”.  Not to mention it is off the hall next to the front door and across from the gust bathroom.  Something had to be done, and quick.  I needed the Best Scrapbooking Furniture I could find.  So I did a yahoo search on the “Best Scrapbooking Orginizer” and that is what I found.  It really is called “Best” and it is great, even fairly easy to put together and very sturdy.
 Click here if interested (they often have a 20% off code in some of the scrapbooking magazines).  I am not affiliated with them in anyway – Just a happy customer .
I didn't even have room to work

At first, my DH was not so keen on me ordering new furniture after we just spent so much on all necessities associated with a new house – so I had to wait.  I finally wore him down in time for my Birthday, and he had to admit – It was looking pretty bad! Here is what it looked like BEFORE (Big sad face).  
Over flow in the hall
It was colorful anyway


All the boxes on my front step 7 July 2008
My birthday Present arrived 2 weeks before my big day!!!  Here are the big wonderful boxes on my front porch back in July 2008.

I am the “putter together” person in the house – Just part of my spatial ability I guess.

My initial finished space - photo 7/11
It took me a while to get everything all nice and organized.  I always get messier in the processes of organizing; it is a talent that cannot be rushed. 
After some more orginizing


This is the scrapbook page I did in regard to my space.
Here is my newest addition and the prompt for this post – I just bought the hutch to the desk.  The new purchase is because, of course, I have “gathered” more “stuff”.  I also needed some space for my business supplies (all the Close to my Heart goodies (CTMH)).  For the CTMH business supplies I also bought the tuck-away that fits under the desk, but I have that over by my computer.
4 years lalter - Nice new hutch - 2012

  What you don’t see in these photos is the other half of the office, my computer area, or my Imagine (which is also sharing the other half of the office with the guys).

Okay, okay, here are some photo of the rest of the office, cat, and all.    

My cumputer spot (See the kitty ears behind print looking out window?)
The space my guy's share (3 ares on one side of the room)


And a few more shots of my craft space. 


 Hope you enjoyed the tour.
God bless and Happy Scrapin’

Friday, June 29, 2012

"Chillin'" - Hot Summer Colors Challenge

Wanted to share this cute card I posted for the “Hot Summer Color” challenge over on  My craft Spot .  I use some cool colors too– It has been so hot here in Texas (in the 100s this week) – I just had to cool this little penguin down. I think he is so cute! 

Penguin:  From ZooBalloo  (one of three)  with a tweaked beak so he could suck the straw
Sun:  Just Because Cards (sunflower)
Sunglasses:  Create-A-Critter (cut in half)
Lemonade glass:  Just Because Cards
Waves: Stand and Salute
Sand: Paper Dolls for Everyday
Chillin’”: Create-A-Critter
Papers:  The blue “sky” paper is from a boy stack, that I don’t have the name of.  I used open cardstock and sandpaper for the sand.  I used Prismatic Paper Pack  from Best Occasions for the sun and the shades shinny parts . 
Straw: A little piece of silver elastic ribbon
 

This made a nice card for one of the neighbor boy’s birthday.  Hope you are staying cool in the hot summer “colors”.


Happy Summer, God Bless and Happy Scrapin’!

Saturday, June 23, 2012

Fun and Elegent Cards

Here are some really cute cards I designed using the Art Philosophy Cart and some papers and stamps from Close to my Heart.  I love how these turned out-- Fun and elegant at the same time.  
Oh, this is also a sneak peek of what we will be making at our club meeting in July.

Supplies:
Lagoon and cocoa inks, some antiqued brads, Stella Paper pack (CTMH), Bitty pearls, a few circuit cuts, Exclusive Stella Stamp, Life is Tweet stamp set, adhesive and BAM – Beautifully Assembled Masterpiece

Cuts
Card 1:              Bird cut at: 2.47 x 2.27
                    Branch cut at: 4.3 x 1.9
                    Framed shape cut at: 2.6 x 2.9

Card 2:              Flower cut at: 2.25
                    Circle cut at: 1.25
                    Tab cut at: 2.0 x .79
                          (and cut in half)

Card 3:              Outer label cut at: 2.9 x 1.4
                          Inner label cut at: 2.2.6 x1.15
                   chair is hand cut from a stamp                          

You can buy all needed supplies to make these cards at the link in the top left of my blog or click here “Shop with me

 God Bless and Happy Scrapin’

Friday, June 22, 2012

Box of Goodies!


A few months back I ordered a box from a warehouse sale over at Belle Blvd (http://www.bellablvd.typepad.com/).  It was a box of random stuff for around $40.  It came in just in time for Mother’s Day but I forgot to post photos of all the goodies – here is what I got:
Cool beans, huh!?!
There are some girlie things in the mix.  I'll have to figure out some creative way to use the girlie stuff and offend the guys in my life -- I'm the only girl in the house.

Stay-tuned - I have some really cute cards to share.

Friday, June 15, 2012

4th of July Banner

Independence Day is just around the corner so I have a patriotic project to share with you.

Here is a banner I made for our Annual 4th of July Picnic.  I used Elegant Edges for the lacy scalloped circles.  Elegant Edges is a great cartridge by the way.  It is one of the few I paid more that $40 for.  Worth it, but of course I found it on sale a few weeks later.  I just couldn’t wait on this one when it came out back when.  


I used Platin School Book for the letters (this and Hello Kitty are my favorites for banner letters and titles).  I used papers from 3 stacks: The Paper Studio (A Boy’s Universe), DCWC (The Green Stack), and K & Company (Air Force Paper).  All the papers had a different back (either white or a different print).


I used Stand and Salute for the triangle pinafores and the USA circle.  The neat thing I did was wielded a scallop, from Elegant Edges, on top of the triangle.  When I cut these on two-sided and folded them over, I got a beautiful lacy ruffle dimension. 

Once they were cut I scored them all at the top of the triangle and folded the elegant edge over.  Next, I got to use another favorite tool, my Crop-A-Dilel II, to punch holes in the stack all at once.  I used various scraps of red, white & blue ribbon to tie them all together.  Viola – A beautiful July Banner!!

I made one more banner for my neighbor who came home from Iraq (but I forgot to take picture).  If you remember, last year, I made her a going away album of animal cards for her to send to her three little kidos while she was gone – They loved it.

As Always,
God Bless and Happy Scrapin’!


Saturday, June 2, 2012

JUNE CLUB -- 3D Flower Layout and Six Cards

I wanted to share my projects for my June Club meeting.

Here I used the Art Philosophy cart and CTMH Pemberley Papers.  The stamps are CTMH, too.   Five of the cards are from the CTMH workshops on the go bonus ideas, but one of the cards and the 2-page layout are my creations.  I find myself using this CTMH Art Philosophy cart more than any other. I highly recommended it as a must have cart.


I learned by accident that if you put a stamp on a photo it lifts the ink off – that is for photos  that I printed at home on cheap generic photo paper.  When it happened accidently, the stamp landed right off the face in the photo – not nice.  However,  it did give me an idea.  Here you see I stamped a phrase on to the photo.  I will have to work with it more, but I think it is a cool affect.  

 If you would like the cut info for the cards, go to katsscrapbox.ctmh.com and click on “Ideas & Inspiration” on the top runner.  Then click on “Workshops on the go”.  Then click the "bonus project" for the Pemberley kit, and all the cut info and directions are there.  Or you can just follow this link here:
http://katsscrapbox.ctmh.com/CTMH/Content.aspx?id=/en/sitecore/content/OBA/Ideas_and_Inspiration/WOTG.aspx%3fp%3d%7b53EB8DEF-3D53-480C-ACE9-A1D827FB8E42%7d

If anyone wants the supply list here it is:

·        Workshop on the go Pemberley Kit (G1003 - page 25)                               $29.95

·        Color-Ready garden Wooden Shapes (Z1718 - page 129)                                $5.95

·         Light Neutral Cardstock   (Z5913 - page 9 )                                                        $7.95
Okay, I guess I will need to go make some Father’s day cards.  

 God Bless & Happy Scrapin!

Friday, June 1, 2012

Mini Teacher Gift Bags

I had my first Close to my Heart home gathering - only 2 people showed (sad face here with big pouty lips).  Oh well.  You win some you lose some.   We had a good time with the ladies that did show.  Big shout-out to Cyndi and Anna - Thanks for making it a fun evening!. 

Here are the projects we did at the gathering.
 

I used these cute little bags (cut from the Art Philosophy cart) for the teacher thank you gifts.  The stamps and papers are CTMH as well.  The bags are cut at 5” and the plaque on the bags are  cut at 2”. To fit a gift card better I would maybe stretch the bag a bit 5 ½ .


We also made a bookmark. I used papers from CTMH Florentine paper pack for this.


God Bless & Happy Scrapin!